###Step 1: Download and install Limechat
If you don’t already have LimeChat installed, you can download it from the App Store or visit the LimeChat website to download and install the software
###Step 2: Create new server connection
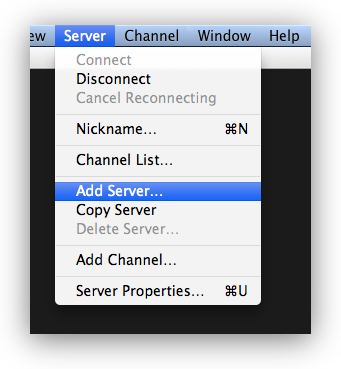
When you open LimeChat the first time it starts a connection wizard. You can skip it and add a new connection from Server / Add Server… menu in the OS X status bar.
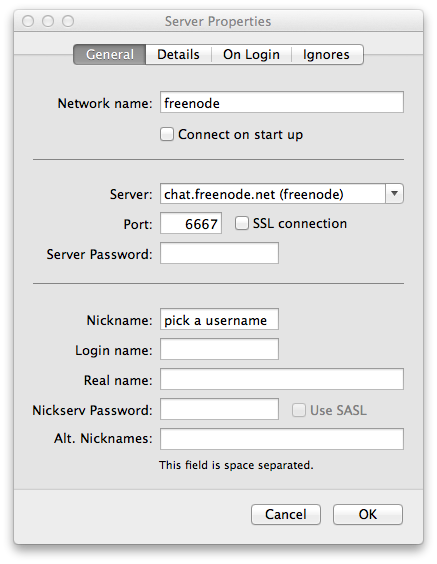
Enter the following settings:
###Step 3: Add a Channel
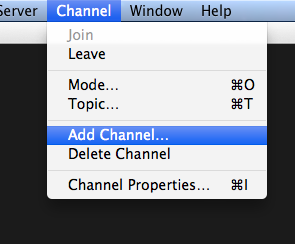
Channels are like chat rooms if you are used to AOL or Instant Message clients. You can add a channel using the menu bar -> Channel -> Add Channel
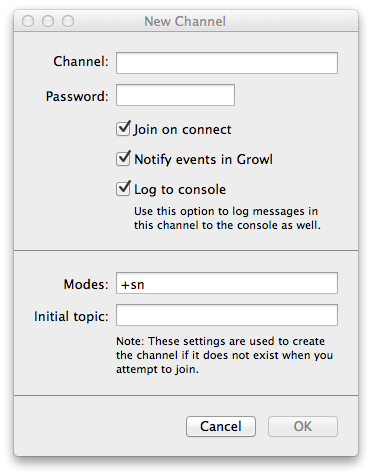
Enter the information about the Channel you would like to add – really the only thing required is the channel name. Don’t enter a hash (#) sign before the Channel name.
###Step 4: Connect
Connect to a the server, then connect to a channel. LimeChat should be able to connect and join channels automatically. If you’re not connected, right click on the server name and select Connect or select Server / Connect from the OS X status bar.
To join a channel manually, got to the Channels / Add Channel… menu in the OS X status bar. Available channels are listed on your dashboard.
###Step 5: Start chatting
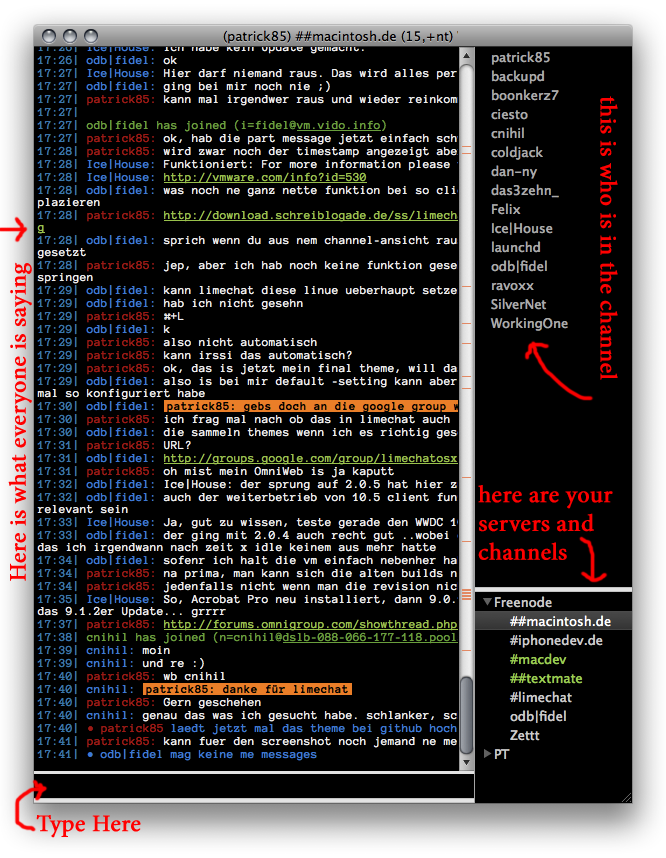
Now that you’ve connected you can start chatting! You can add multiple servers and channels and they will show up in the bottom right. Right click them for more options.

