Connecting to a Shared Folder with VirtualBox and Windows XP is easy. In the following example Windows XP (TinyXP) is being used to connect to VirtualBox on Mac OS X Mountain Lion.
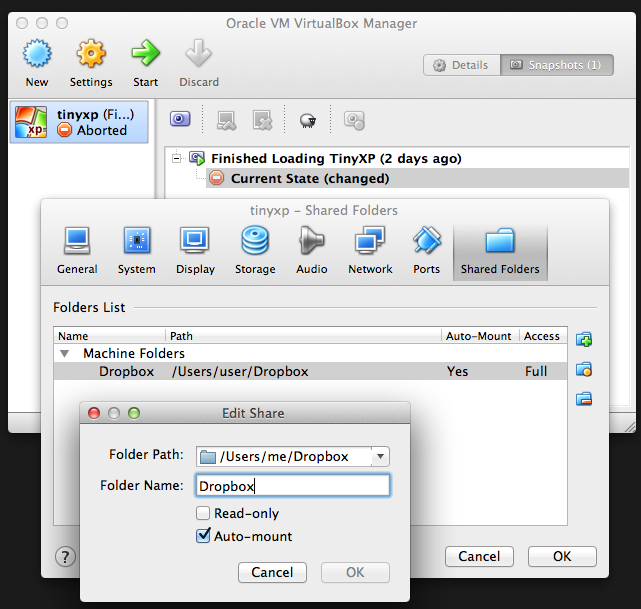

1. On your list of VirtualBox machines choose the windows XP machine you want to share a folder with and then click “Settings”
2. Choose the “Shared Folders” tab and then select the path on your host computer that you want to share with the Virtual Machine
3. Select the options “Auto mount” and “Make permanent” if you would like this connection to persist
4. If your Windows XP virtual machine is running you **may need to restart it**
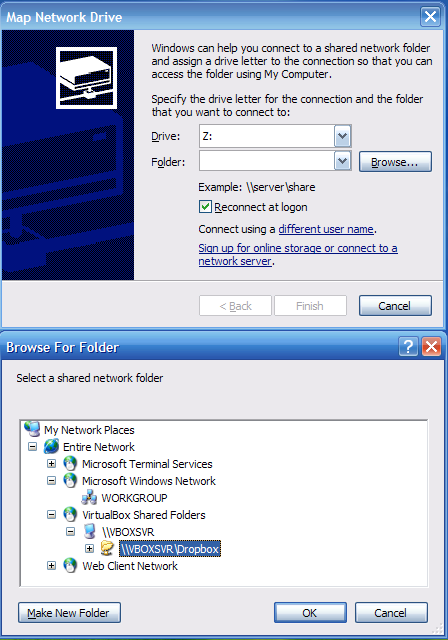
5. Open “My Computer” and from the “Tools” menu choose “Map Network Drive”
6. When the “Map Network Drive” dialog box opens click on “Browse”
7. Choose “Virtualbox Shared Folders” and then “\\VBOXSVR” and then the name of your shared folder – (VBOXSVR is how virtualbox refers your host machine – opposed to Remote Desktop / Terminal services which refers to it as \\tsclient / tsclient )
8. Click OK and now you should have your new drive appearing in “My Computer”